
Heat pump system installation

Designing a heat pump system always begins with assessing the property's characteristics: its size, heat demand, the type of existing heating system, and the condition of the insulation are all important.
To select the appropriate unit, the heating and cooling requirements, the amount of domestic hot water needed, the specifications of the electrical network, and the possibilities for expansion and control must be taken into account.
A well-sized system ensures efficient and reliable operation in the long term, avoiding errors resulting from undersizing or oversizing.
How does a heat pump system work in practice?
-
🌬️ Utilization of outside air
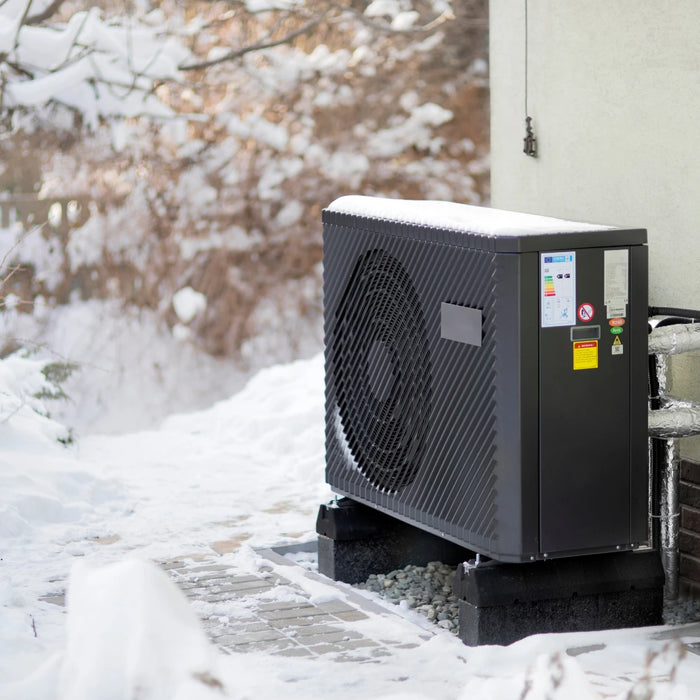
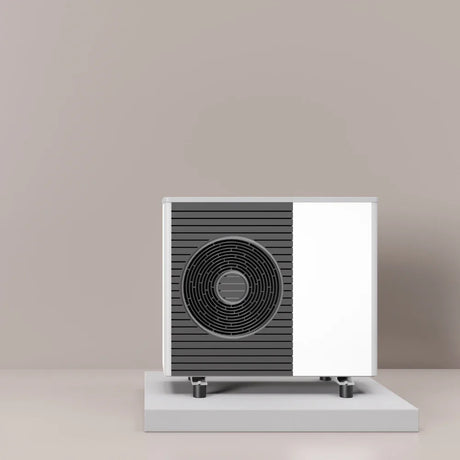
A heat pump utilizes the thermal energy of ambient air, even in winter. The outdoor unit extracts heat from the air, even at low temperatures, with the help of a refrigerant. This thermal energy is then transferred to the indoor unit through a closed loop.
-
🔁 Heat transfer for heating and domestic hot water
Heat is transferred through the indoor unit to underfloor heating, radiators, fan-coil units or a domestic hot water tank. Depending on their type, heat pumps can heat, cool and produce domestic hot water.
-
🤖 Intelligent Control
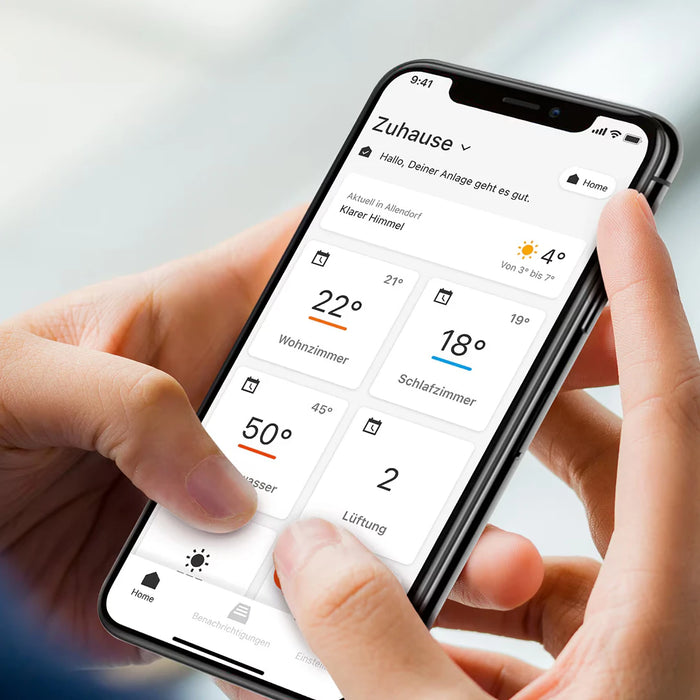
The system controller automatically regulates operation according to current heat demands. Some models can be controlled remotely and can be connected to monitoring systems or solar panel systems.
Heat pump installation procedure
1. Contact and preliminary consultation
In the first step, the contractor collects the basic data of the property: heated floor area, type of existing heating system (radiator or underfloor heating), characteristics of the electrical network, and the type of system (split or monoblock). In the case of a split system, refrigerant pipes may need to be installed at this stage, while with a monoblock system, this is not required, and the mechanical system connects directly to the outdoor unit.
2. On-site survey and unit placement
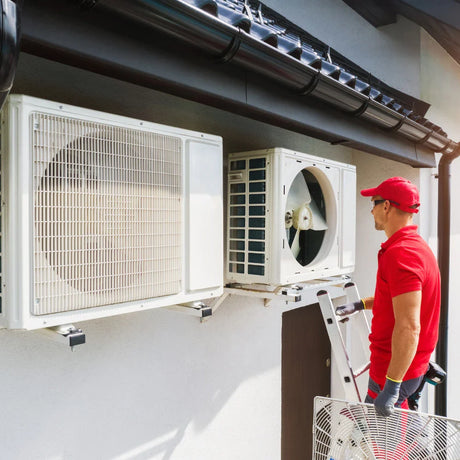
The specialist surveys the ideal locations for the outdoor and indoor units. For split systems, both are important, while for monoblock systems, only the outdoor unit placement is carried out. They determine where the heating connections are (to radiators, underfloor heating), if there is enough space for a buffer tank or domestic hot water tank, and take precise measurements for the necessary installation works.
3. Indoor unit installation (for split systems)
For split systems, the indoor unit, also known as the hydraulic module, which includes the heat exchanger, circulating pump, control system, and basic safety elements, is mounted on a stable wall surface. Refrigerant, condensate, and communication lines pass through the wall penetration. In the case of a monoblock, this step is omitted, as all functions are located in the outdoor unit.
4. Hydraulic connection
For both systems, the water-side connection is important: the system's supply and return lines connect to the heating system via copper or plastic pipes. For split systems, the pipes originate from the indoor unit, while for monoblock systems, they connect directly to the outdoor unit, which contains the internal pump and control system.
Elements to be installed for all systems:
- pump group (if not factory fitted),
- expansion tank (8–12 L),
- safety valve (3 bar),
- automatic air vent,
- shut-off valves,
- water filter (sludge separator),
- fill/drain connections,
- mixing valve (for radiator + underfloor heating),
- DHW tank connection (for indirect tank) integrated with the control system.
5. Outdoor unit placement and connection
The outdoor unit is mounted on a solid, level, vibration-damped base or console, with at least 30–50 cm side clearance and a minimum of 1 m clear space in front for proper ventilation and maintenance. For split systems, refrigerant pipes lead here, while for monoblock systems, water-side pipes connect directly here.
6. Mechanical and refrigerant pipes, condensate drainage
For split systems, the copper pipes between the outdoor and indoor units are insulated and installed with precise bends. For both systems, condensate drainage occurs by gravity, with appropriate slope, either through an external wall or into a drain. In the case of a monoblock, there is no refrigerant circuit: only the water-side part needs insulation.
7. Electrical and control connections
The equipment always requires a separate circuit, with appropriate fuse, surge protection, and grounding – for a split system, this applies to both the indoor and outdoor units. Communication can be established between the indoor and outdoor units, thermostat (room and DHW sensor), and for smart control, also with a Wi-Fi module.
8. Evacuation, charging, and test run
For split systems, the refrigerant circuit is evacuated with a vacuum pump and then charged, following factory specifications; for monoblock systems, only the water-side system is filled and vented. During the test run, water pressure, temperature, and noise levels are checked, then the control system is fine-tuned (zones, ECO, PV operating mode).
9. Training, documentation, handover
At the end of the commissioning, the owner receives detailed instructions on how to use the control panel, the operating modes, maintenance tasks (e.g., filter cleaning, checking water pressure), and receives the commissioning protocol, warranty documents, and assistance with activating remote monitoring or the application.

Main advantages of heat pump systems
✅ Outstanding energy efficiency and low operating costs
✅ Outstanding energy efficiency and low operating costs
Heat pumps utilize ambient heat (from the air, ground, or water), thus requiring less electricity to produce the same amount of heat compared to conventional heating systems. This results in more predictable and lower utility costs in the long run.
✅ Environmentally friendly operation, zero on-site emissions
✅ Environmentally friendly operation, zero on-site emissions
The system does not burn fossil fuels, so it does not produce CO₂ or other air pollutants locally. Its use reduces the household's carbon footprint, especially when combined with a solar panel system.
✅ Heating, cooling, and hot water - from a single system
✅ Heating, cooling, and hot water - from a single system
Most air-to-water heat pumps are not only capable of heating but also suitable for cooling (e.g., via fan coils), and they also produce domestic hot water in one system, thereby saving space and investment costs.
✅ Comfortable, constant temperature - precise control
✅ Comfortable, constant temperature - precise control
The advanced control systems of modern heat pumps allow for precise temperature regulation, even on a zone-by-zone basis. Thanks to inverter technology, the unit adapts to actual needs, thus avoiding temperature fluctuations.
✅ Increases the value and energy rating of the property
✅ Increases the value and energy rating of the property
Properties equipped with a heat pump system receive a more favorable energy rating, which is a value-increasing factor in the long term – especially in the case of new construction or renovation.
✅ Quiet, concealed operation
✅ Quiet, concealed operation
The outdoor unit operates with low noise, and the indoor unit is often located in a boiler room or utility room, so its operation does not disturb the comfort of the residents.
✅ Expandable, future-proof system
✅ Expandable, future-proof system
It can be easily integrated with solar panels, smart control, or energy storage, thus offering a flexible and sustainable solution in the long term. It is an ideal choice for anyone who wants to gradually build their energy independence.

Frequently Asked Questions
How long does it take to install a heat pump?
How long does it take to install a heat pump?
Installation typically takes 2–4 days, depending on the complexity of the system. It may be quicker for newly built properties or with pre-installed mechanical preparations, while integration into an existing heating system may require more time and modifications.
What preparations are needed before installation?
What preparations are needed before installation?
It is necessary to survey the existing heating system and electrical network, and to clarify whether there is underfloor heating or a radiator system, whether a hot water tank connection is required, and whether there is adequate space for the indoor/outdoor unit. The electrical supply (1 or 3 phase) and the fuse size are also essential.
Is a permit required for heat pump installation?
Is a permit required for heat pump installation?
Private individuals generally don't need official permits, but local municipal regulations (e.g., placement of outdoor units, noise impact) may vary. Electrical design may be necessary, especially for 3-phase systems or if connected to a solar panel system.
Is there a difference in the installation of split and monoblock systems?
Is there a difference in the installation of split and monoblock systems?
Yes. A split system consists of an outdoor and an indoor unit, which must be connected with refrigerant by a qualified refrigerant handler. A monoblock system only has an outdoor unit, which connects to the heating system on the water side, making installation simpler and faster – but it requires frost protection (e.g., thermal insulation, antifreeze) against freezing in winter.
What space does the system require?
What space does the system require?
The outdoor unit requires a stable base or wall bracket, in a well-ventilated, easily accessible location. The indoor unit (if present) will be placed in a utility room or boiler room. In addition, space must be provided for the buffer tank, domestic hot water tank, pump group, and fittings – especially with split systems.
Do the existing radiators need to be replaced?
Do the existing radiators need to be replaced?
Not necessarily. If the existing radiators have sufficient heat output even at lower supply temperatures (e.g., 35–45 °C), they can be kept. In some cases, however, it may be necessary to replace them with larger or more modern radiators to achieve adequate comfort.
What happens to the old boiler?
What happens to the old boiler?
When installing a heat pump, the existing boiler can either be decommissioned or kept as a backup. There are cases when the two systems can operate in parallel (bivalent system), for example, during extreme cold weather.
What kind of electrical connection is needed?
What kind of electrical connection is needed?
Depending on the appliance type, 230 V (1 phase) or 400 V (3 phase) is required. In addition, the heat pump's circuit must be equipped with a separate fuse, overvoltage protection, and often an RCD (residual current device). Connecting it to a solar panel system also requires further preparation.
When can the system be turned on?
When can the system be turned on?
After the system has been evacuated, leak-tested, pressure-tested and electrically tested, commissioning takes place, during which all settings are configured (heating curve, DHW priority, zone control, etc.). After this, heating and/or domestic hot water production can begin.
Will I receive training on how to use the system?
Will I receive training on how to use the system?
Yes, the contractor will always explain how the control system works, provide maintenance information, basic settings, and hand over the necessary documents: warranty card, commissioning protocol, operating manual, and, if applicable, remote monitoring registration information.